Administrator account
There are significant differences in the Oneyar free attendance and absence system and the user account of administrators and managers of the organization with personnel. In the following, you will get acquainted with the features of the administrator account.
Administrator account menu
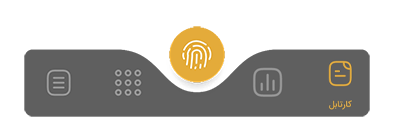
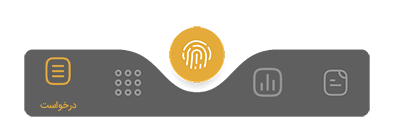
Traffic registration menu:
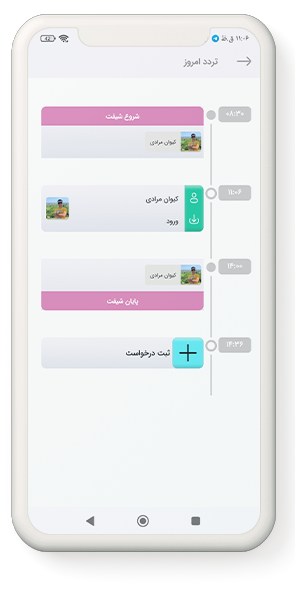
The main menu for managers and personnel is traffic registration. This page contains the following information:
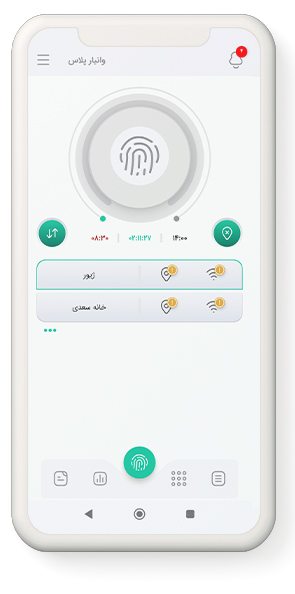
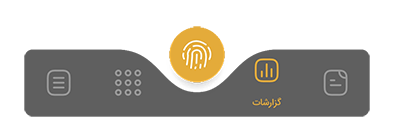
Traffic registration button: The traffic registration section consists of several parts: the traffic registration button in the center of the circle, which, as the name suggests, has the task of recording personnel traffic, a colored band around the traffic registration button that shows the amount of work shift elapsed.

At the bottom of the circles in this section, there are 3 boxes, each representing a topic.
The first box from the left represents the start time of the work shift. If the entry is delayed, the numbers inside this box will be displayed in red.
The middle box is the time left until the end of the work shift. This time is displayed in the reverse way, i.e. as a decreasing trend to zero. But if the personnel's work shift ends, this number will be displayed incrementally
The box on the left is the scheduled end time of the shift
Today's traffic: By touching this button, the user can view the traffic of the current day in the form of a timeline.

Also, in this section, the user can send all kinds of requests including leave, mission, etc. to his manager.
Incomplete traffic: .In this section, traffics for which entry is registered but exit is not registered are displayed.

By viewing the list, the user can view the date and time of entry as well as his place of work, and by specifying the exit time, he can send a request to forget the departure traffic to the main manager or the manager of his organization.
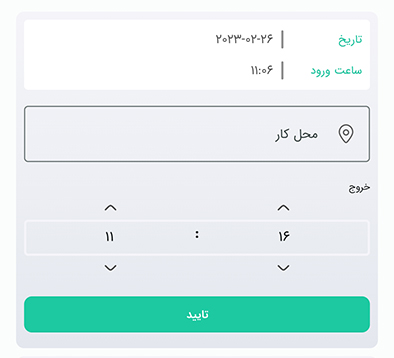
Requests to forget the exit traffic can be seen in the folder of the manager or the manager of the organization, and the manager takes an appropriate response to the request by approving or rejecting the request.
List of workplaces: In this section, a list of the user's workplaces can be seen. By viewing this list, the user can see the authorized mechanisms for recording his traffic, and if any of the conditions are not met, he can notice the reason for not registering his traffic with a red warning sign.
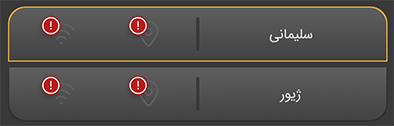
One of the main reasons for not registering personnel traffic is that Wi-Fi is turned off or the location of the user's cell phone is off.
Another common reason for not registering traffic is the small radius allowed for the location of the workplace in the workplace definition section. To solve this problem, from the dashboard menu, then touch the workplace and finally, click the button to edit the desired workplace and increase the radius.
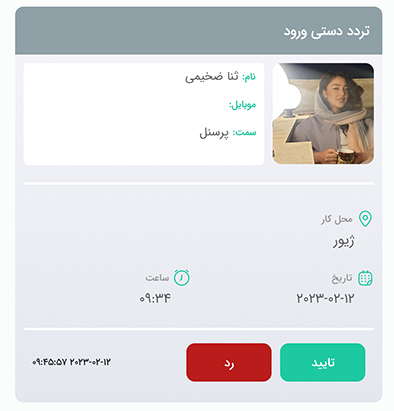
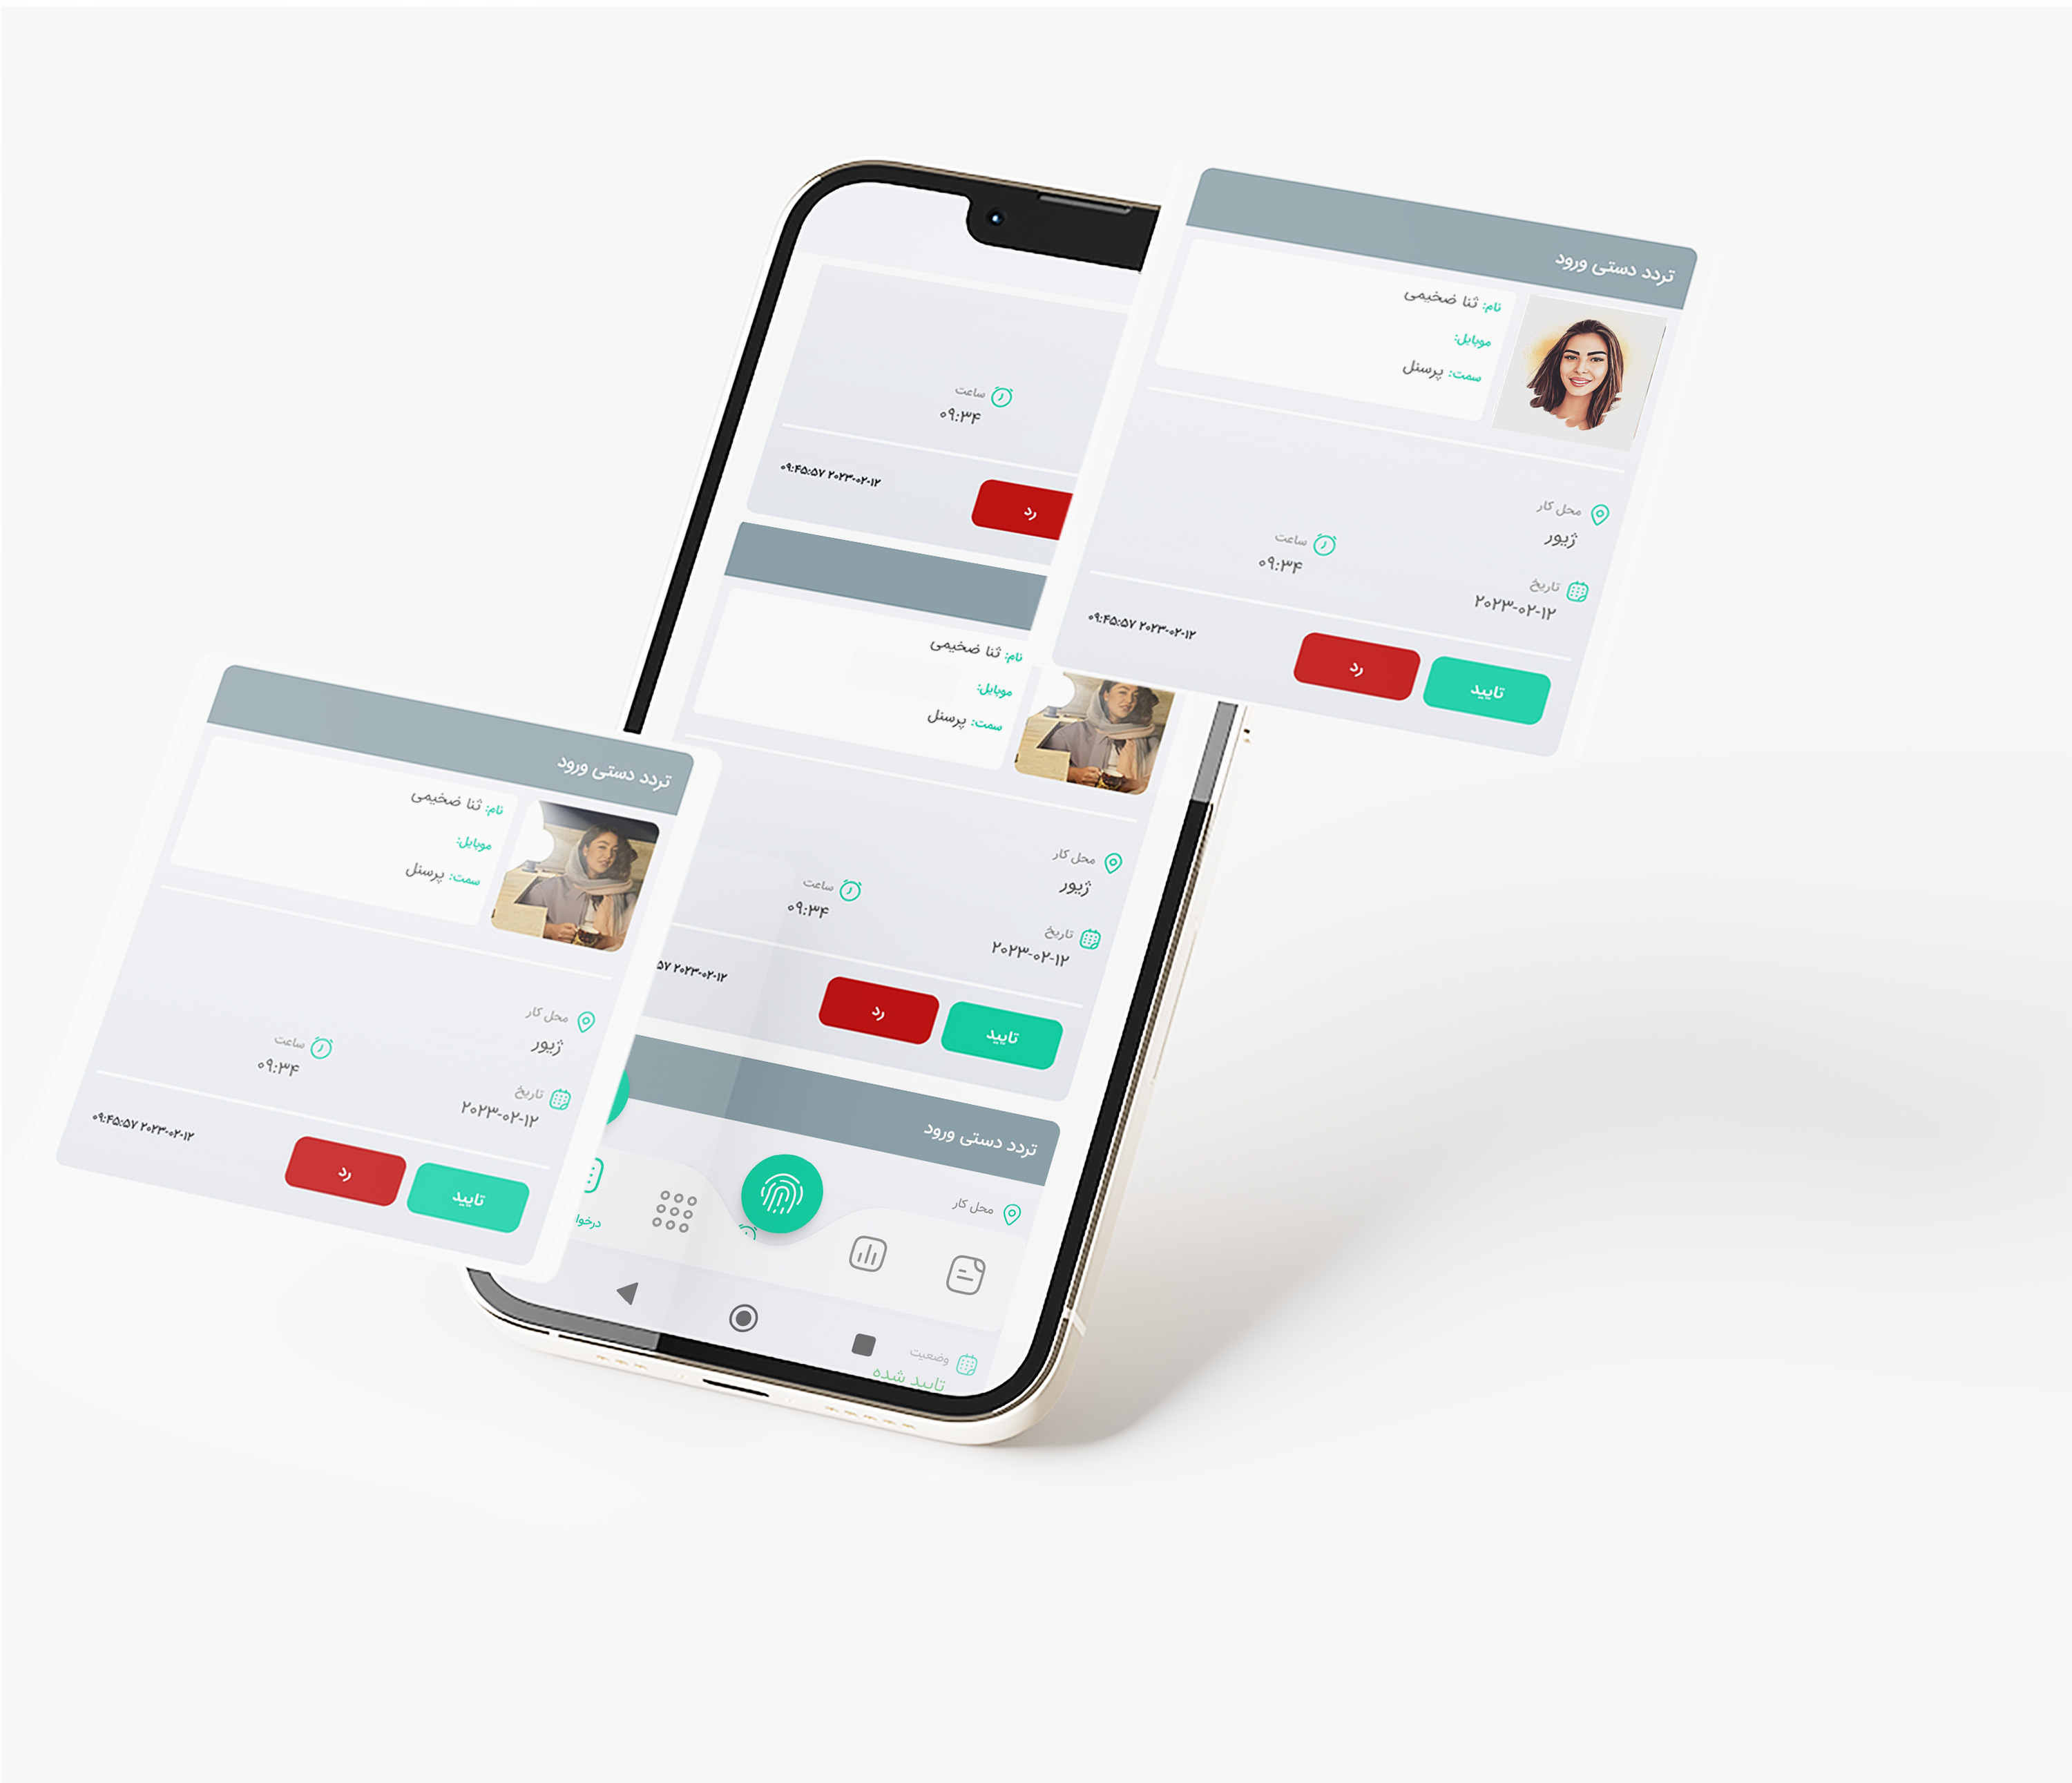
Cartable menu:
The cartable section is related to personnel requests. The manager can reject or approve the requests by viewing the types of personnel requests.

After determining the tasks of the requests, a message will be sent automatically to the personnel according to the manager's decision to inform the personnel.
Reports menu:
This section is related to the reports of the manager S. Of course, this menu also exists for the rest of the personnel and each user will see the information related to him.
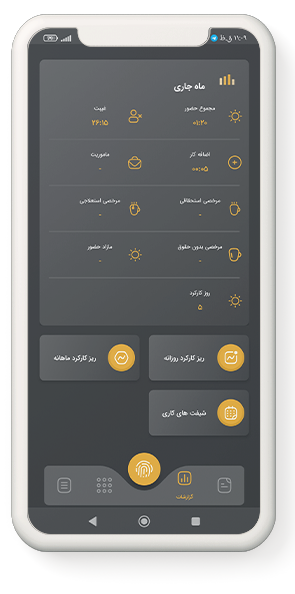
The upper part of the report page is related to total attendance and absenteeism in the current month.
The bottom part of this page contains three buttons as follows:
Daily routine: This part includes two sections, traffic and operation details.
In the traffic section, the user can see his traffic timeline, also in the operation details section, he can see the total attendance, absence, leave, etc. for the specified day.
At the top of the page, by selecting the filter button, you can adjust and view the report according to the desired date.
Monthly details: This part includes three sections: traffic, work shift and work details.
In the traffic section, the user can see the timeline of his traffic in the default time frame of the current month, and in the work shifts section, he can see the related information, and finally, in the work details section, he can see the total of attendance, absence, leave and ... in the specified interval.
At the top of the page, by selecting the filter button, you can adjust and view the report according to the desired time period.
Shift work : In this section, you can see the work shift by time period.
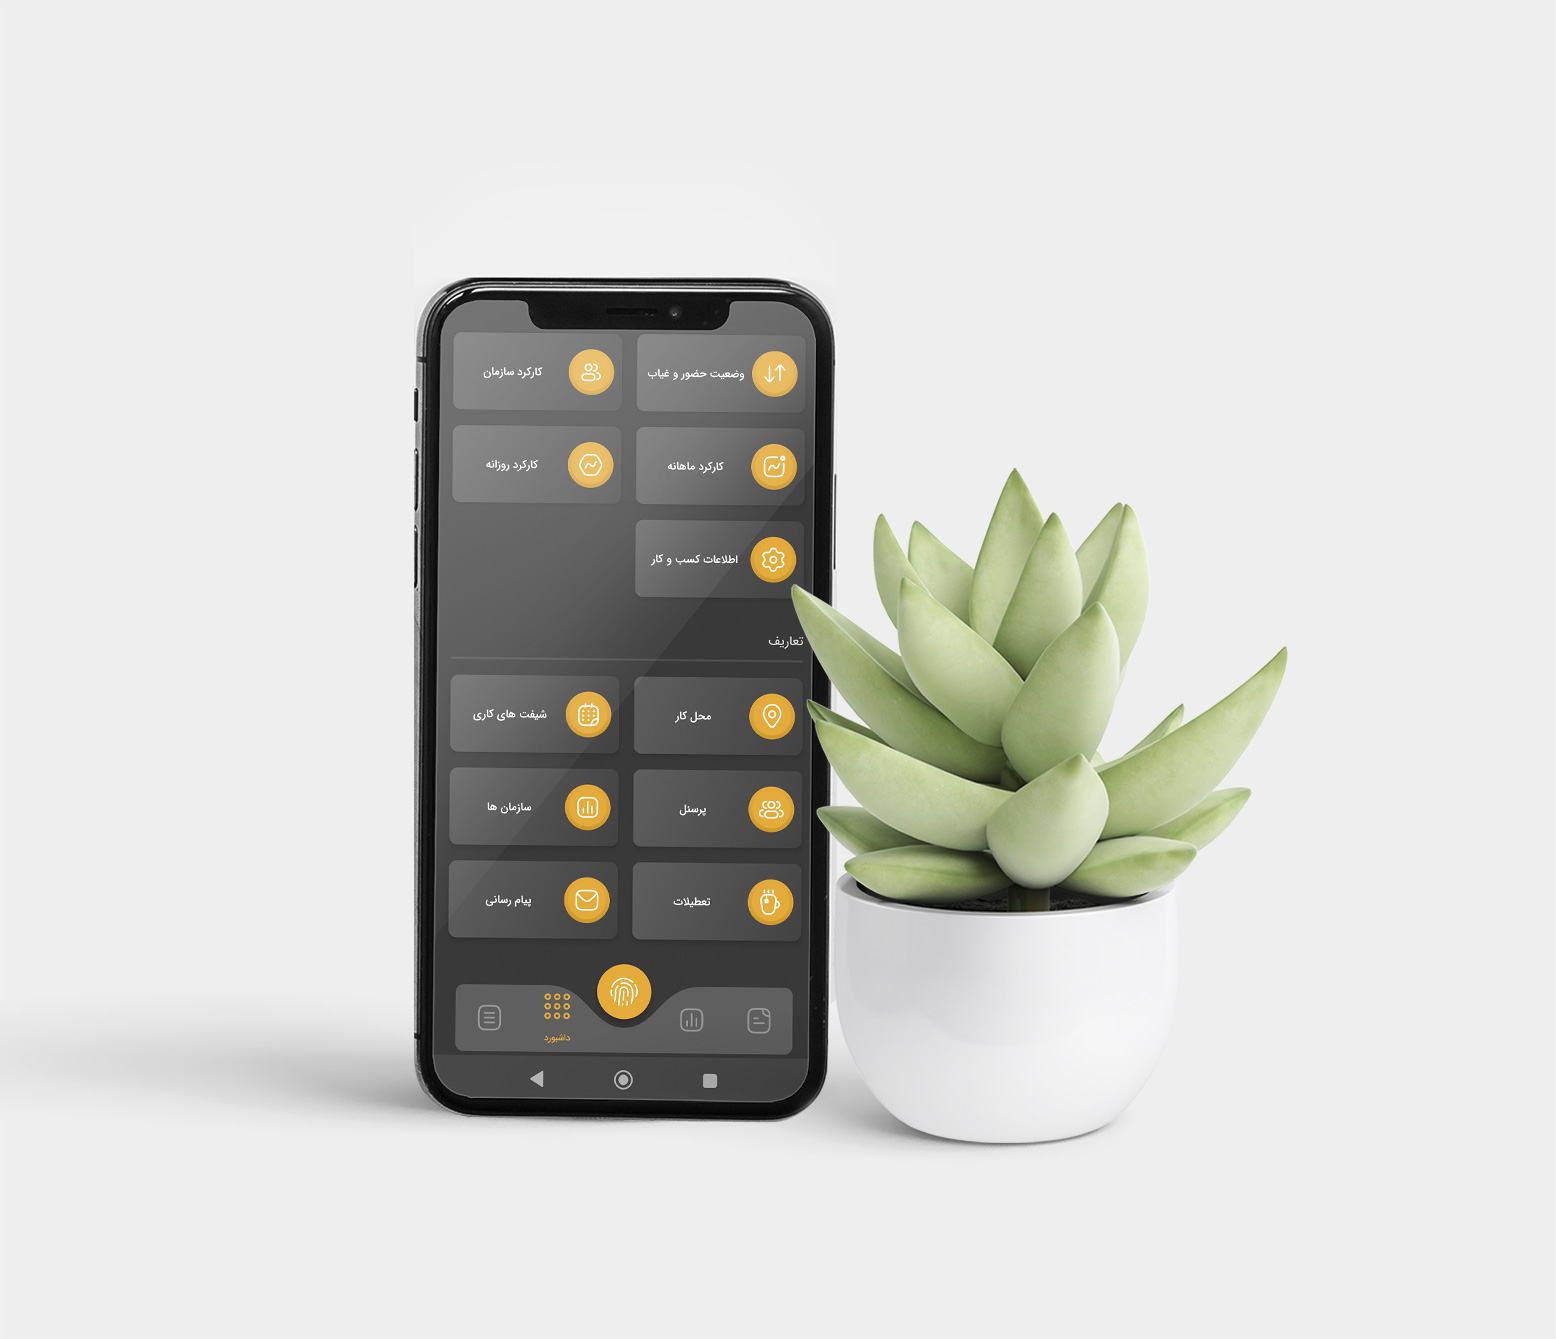
• Dashboard menu:

This menu is one of the most important parts of the administrators account. It has two sections, reports and definitions.
Reports section included :
Presence and absence: By referring to this section, the manager can know the current status of his business.
Attendance is divided into the categories of present, absent, people who went on a mission, etc., which can be seen in each category of personnel details, as well as information on the time of arrival, etc.
It is worth mentioning that the attendance status report is related to the current shift
monitoring : Activate monitoring to automatically check the presence of personnel at the workplace. In this unique feature of the Vanyar application, after registering the entry by the personnel, the system automatically checks the presence of the personnel at the workplace in different time intervals, and the manager can check the current status of his personnel by referring to this section. be aware
Monthly work of personnel: By referring to this section, the manager can know the current status of his business.
Daily work of personnel: By referring to this section, the manager can know the current status of his business.
Connected devices: By referring to this section, the manager can know the current status of his business.
Advanced reports:By referring to this section, the manager can know the current status of his business.
The definitions section includes:
• Definition of workplace:
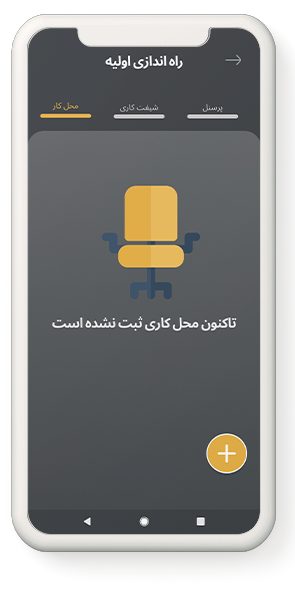
In this section, a list of workplaces can be seen, and by pressing the + button on the bottom right corner of the mobile phone screen, the definition of a new workplace opens
Workplace settings are an important part of this system, this part is important because the movement of personnel can be tracked according to the parameters set in this part.
In the workplace information box, you must enter the workplace title and the name of the city where the workplace will be registered.
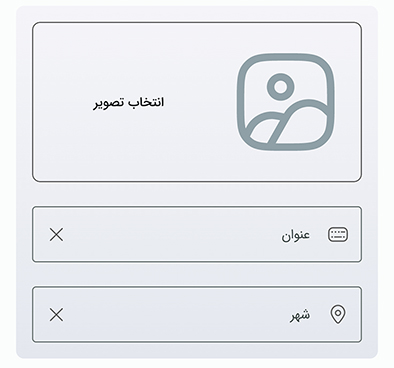
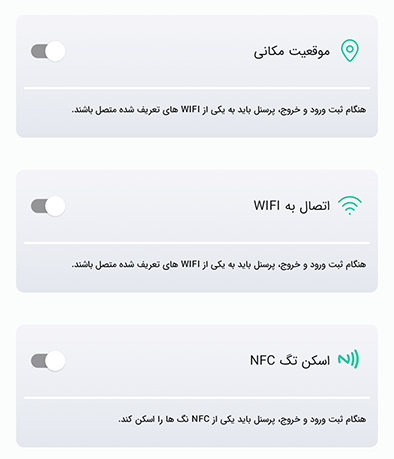
Personnel traffic recording methods include: WiFi signal, NFC tag and geographic location.
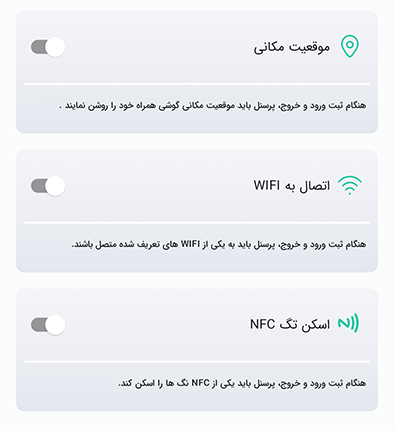
In the geographical location section, activate the box by clicking on the switch box, then click on the button to select the location from the map, and on the map, touch the screen to specify the exact location of the business location, when a green pin appears, specify the workplace. and then touch the confirm button.
In the address box, you can enter the postal address of the place and determine the box related to the permitted radius according to the need and required accuracy.
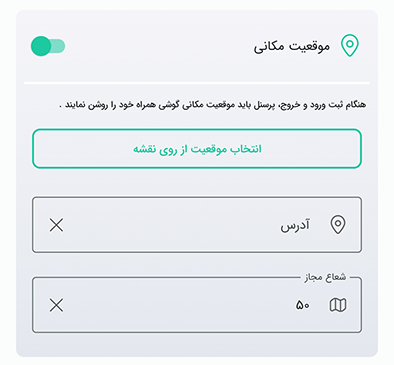
It should be noted that the smaller the allowed radius of the business location, the higher the sensitivity of the system.
We offer you a radius of 50 meters.
In the wifi signal box, if you, as a business manager, want the system to use the modem device to detect the presence at the workplace in addition to the location when your personnel enter and leave, you should check the list of wifis, the desired wifi at the workplace. Select .
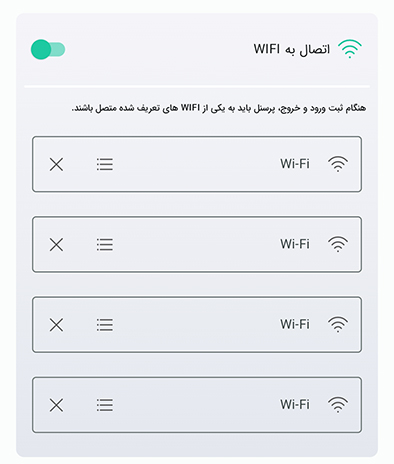
It is obvious that the personnel for whom this type of traffic registration is designated must be connected to the designated wifi.
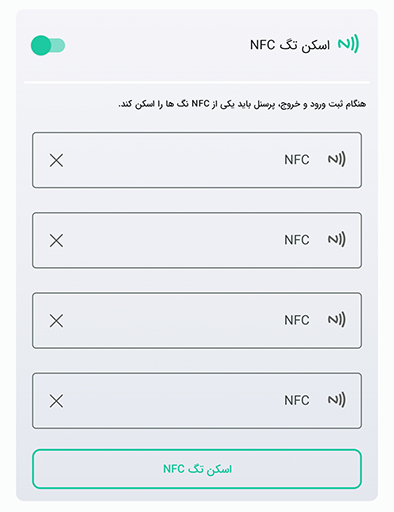
NFC tag box: In this section, if you want personnel to register their traffic with an NFC tag using a mobile phone, it is enough to turn on NFC in the mobile phone settings and bring your phone close to the NFC tag so that the application will be automatically activated. Enter the serial number of the tag in the desired box. Note that you can place any number of NFC and wifi tags in the workplace.
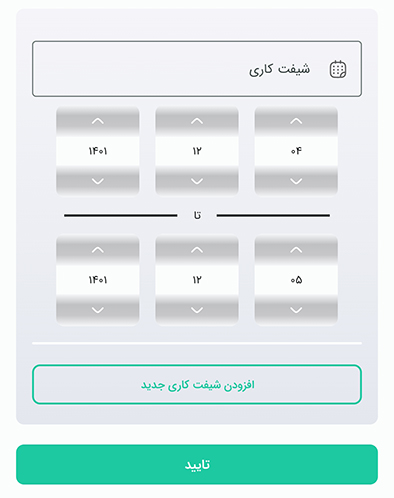
• Definition of work shift:
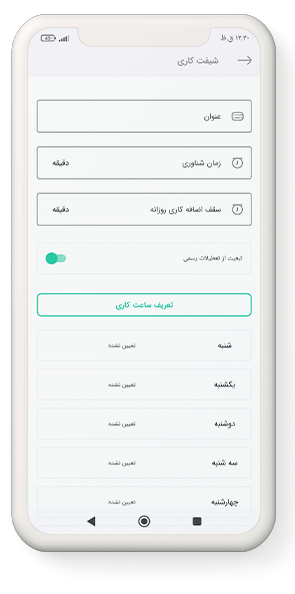
In the shift information box, you must enter the name of the shift, the floating time and the daily overtime limit in minutes.
Floating time means the time according to which your personnel can enter the workplace late during the shift, but for the delay time, they must make up for this time at the end of the shift, in other words, the personnel will be registered with any delay in entry. They should add the same amount to their working time.
If the daily overtime limit is set, the personnel cannot be present in this work shift for more than this time, and if the overtime limit is exceeded, the overtime will be recorded, and as a rule, there will be no rights for this excess for the personnel. will not be considered.
In the compliance with public holidays section, if this option is active, public holidays (according to the calendar of the current year) will be included in the work shift and personnel will not have work shifts on official holidays. If it is inactive, public holidays will not have any effect on work shifts.
Determining working hours: By pressing the button and then selecting the days of the week, the shift entry and exit times are generally determined.
Note 1: If the work shifts are on different days of the week, you can select the days individually and specify the start and end time of the shift, and then touch the confirm button, then select again. New day registered new working hours.
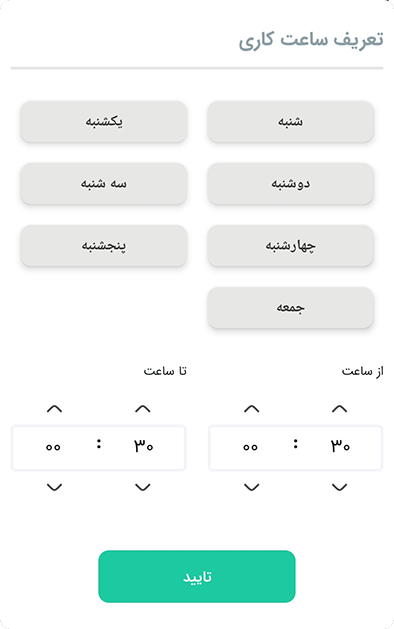
Note 2: If the work shifts are on different days of the week, you can select individual days and determine the start and end time of the shift. But if you have several work shifts for one day, it is suggested to register a separate work shift for each shift. For example, you can register a shift named morning for working hours in the morning and a shift named afternoon for the afternoon.
Note 3: If each of your personnel has their own check-in and check-out time, you can register a specific work shift for each person.
Definition of personnel:
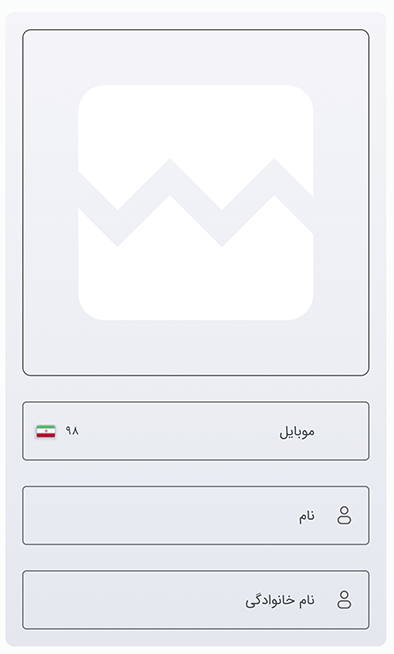
To register new personnel, it is enough to enter the country code as well as the personnel's mobile number, first and last name, and the picture of the employee in the personnel information box. After the personnel registration is completed, an SMS containing the application download link and username will be sent to your personnel.
Note: In the initial setup, the manager is registered as the default personnel, but since the work shift and work place are not registered for him, the system warns that the shift is not assigned. It shows work and place of work that you can activate the manager's account by editing the manager's user account and the assignment of the place of work and work shift, as well as the start and end time of the work shift.
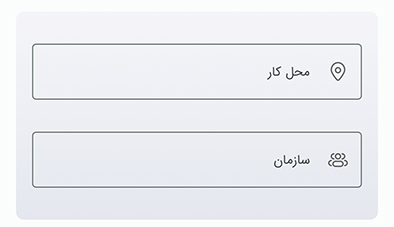
Job information includes workplace, organization name and personnel position. Obviously, filling this information is necessary
In the traffic mechanisms section, the manager determines which mechanisms new personnel are allowed to use to record traffic.
In the work shifts box, choose the work shifts you have defined before or define a new work shift in this section. And finally specify the start and end date of the shift. You can also assign other work shifts for these personnel in addition to this work shift and finally you will register these personnel by pressing the confirmation button.
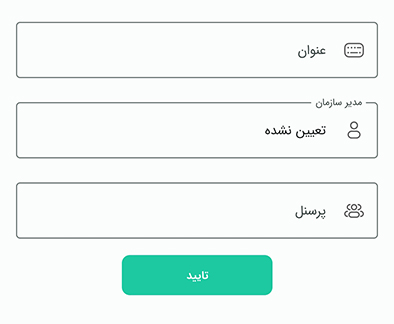
Organizational chart: Sometimes businesses are made up of different organizations that we have implemented in Oneyar's free attendance and absence system.
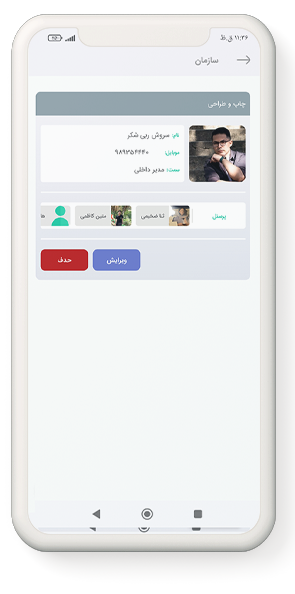
The structure of the organization in the system is such that the manager chooses a title for the organization and selects the manager of the organization from the list of personnel and finally selects the personnel who are supposed to work in this organization from the entire list.
Among the prominent features of this section, we can mention things such as: viewing, approving or rejecting the organization's personnel request by the organization's manager, viewing various types of personnel reports within the organization for the organization's manager.
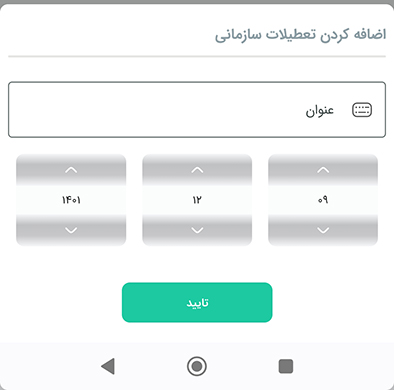
Corporate holidays: Sometimes businesses have their own holidays. In this section, the manager can take days off for his business. Obviously, the personnel will not have a shift on the days closed by the manager.
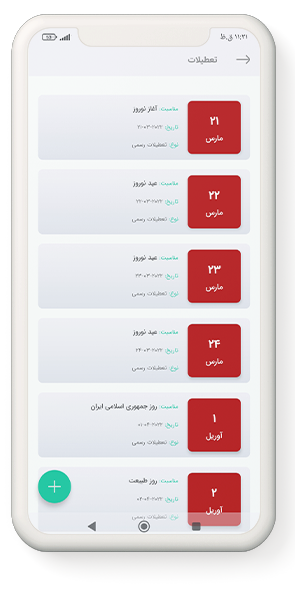
By adding the title and specifying the date, the holiday will be added to the list.
• Request menu:
In this section, a list of sent requests can be seen. The user can see his rejected or approved requests.
• messaging:

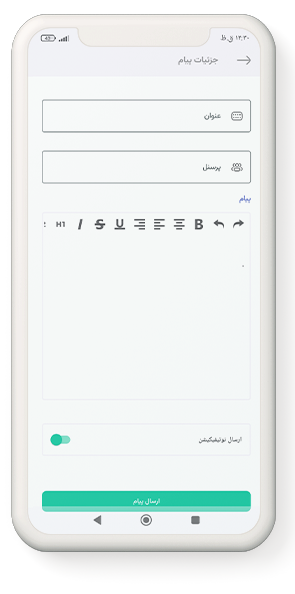
A list of sent messages can be seen in this section. The administrator can send a new message by pressing the + key.
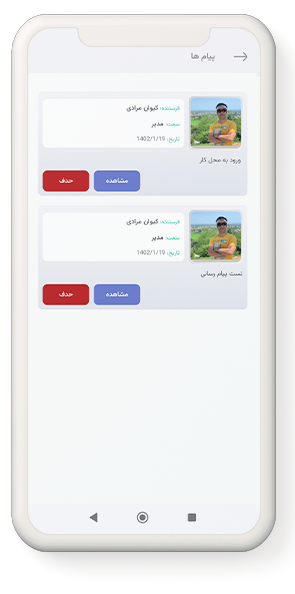
In this list or by clicking the display button of each message, you can see the list of recipients, the text of the message, and also in this list of recipients, you can see the date and time the recipients of the message received the message. have observed
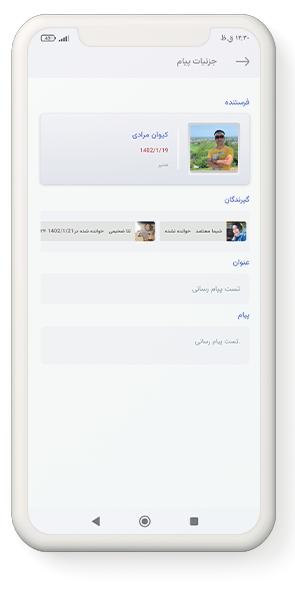
On the page of sending a new message, in the first box, you should specify the subject of the message, and in the second box, the personnel who will receive the message. Also, in the third box, the manager should write his message and finally determine whether the message will appear on the recipient's phone by sending a notification message. or not At the end, send the message to the recipient by pressing the send message button.